How to Replace Your Whirlpool, Kenmore, Roper, or Kitchenaid Electric Dryer's Heating Element
Replacing your Dryer's Heating Element is actually a simple repair. However, first you should make sure that that the problem is the heating element and not the electrical supply, thermal fuse, thermostat, etc. Most people suspect the element immediately, however, in about 50% it's another problem (also simple to repair (which will just save you $).
We do sell the replacement parts!!! Also, feel free to call us with any questions!
IMPORTANT: check the airflow out the dryer's vent. A clogged vent can burn out an element! To check - run the dryer on 'no-heat' or 'fluff' setting and check the vent in the back or for strong airflow.
Also, keep in mind that after fishing the element/thermostat you will probably probably experience a smoky smell as the loosened lint blows through the newly working element and burns up. It is nothing to be concerned about, however, it is a good idea to keep a close watch on the dryer until this passes.
There are basically 3 styles of heating elements in use for these dryers.
|
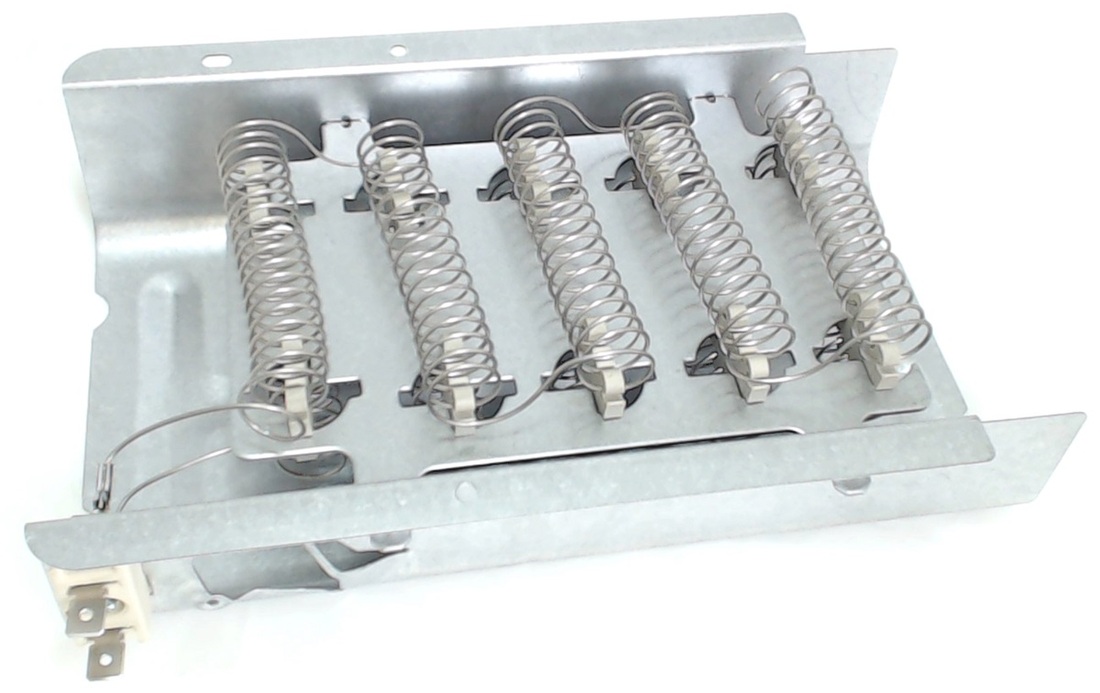
1. The most common, part no. 279838 is accessed from the back:
|
|
Pull the dryer out and remove the back cover. You'll see a long, vertical can on the right side, with the element coil inside. Leave the long can in place and remove two screws, one on each side of the element. You can now slip the element assembly of the bottom of the can. Unplug all wires.
At this point we recommend you bring the entire element assembly with all attached thermostat in to us and we will check what is functioning and what is not and sell you only the parts you need.
However, if you are not in our area you will need to separately check the element and the thermostats to be sure which part is malfunctioning. (You will need to perform a continuity cheek across the element and the thermostats attached. All should read positive for continuity. The part of part that fails is the problem and only that part needs replacing Click HERE for how to do that).
At this point simply replace the thermostat and or if the element is bad move the functioning thermostat from the old to the new element, reattach the wires and scores the new lament back into the can.
|
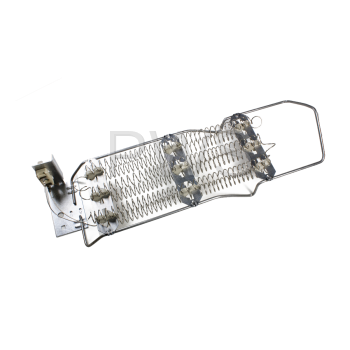
2. The second most common element is part number 4391960. It is also accessed from the back of the dryer, and which looks like this:
|
|
To replace this element remove the back cover and you will see a long, vertical can on the right side. this can contains the element coil. You need to remove this entire can. First, pull all wires attached to the element and the attached thermostats (and/or thermal fuse). Second, the can is held in place by a 5/16 screw and a strap in place at the top, remove the screw (there is a small hole you can se the screw through to assist in removing it). Pull the top of the can beck towards the back of the dryer and it will lift off the hooks that hold it in place at the bottom.
At this point we recommend you bring the entire can element assembly with all attached thermostat in to us and we will check what is functioning and what is not and sell you only the parts you need.
However, if you are not in our area you will need to separately check the element and the thermostats to be sure which part is malfunctioning. (You will need to perform a continuity cheek across the element and the thermostats attached. All should read positive for continuity. The part of part that fails is the problem and only that part needs replacing Click HERE for how to do that).
If it is the element there is one screw that holds it in the can. Simply remove the screw and slid the element out and replace it with the new element and reattach the can and wires.
|
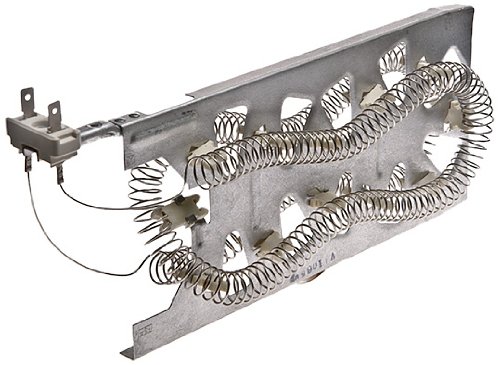
3) Another much less common possibility is to replace part number 3387747 (fits 27" wide dryers):
|
|
The element is replaced from the front of the dryer. Remove the bottom panel by releasing the clips holding it in place with think metal tool. Set the front panel aside. The element is in a can and is held in that can by a single screw. Simply unplug the wires and remove the screw and the element slides out. Leave the can in place.
You should check the element and the thermostats for continuity to determine is the element is bad. All should read positive for continuity. The part of part that fails is the problem and only that part needs replacing (Click HERE for how to do that).
Or you can simply remove the thermostats and element and bring them all to us and we will check the parts for you.
Afterward, simply replace the thermostats and/or slide the new element in and replace the screw holding it in place and wires.
We do sell the replacement parts for all 3 types. Also, feel free to call us with any questions!